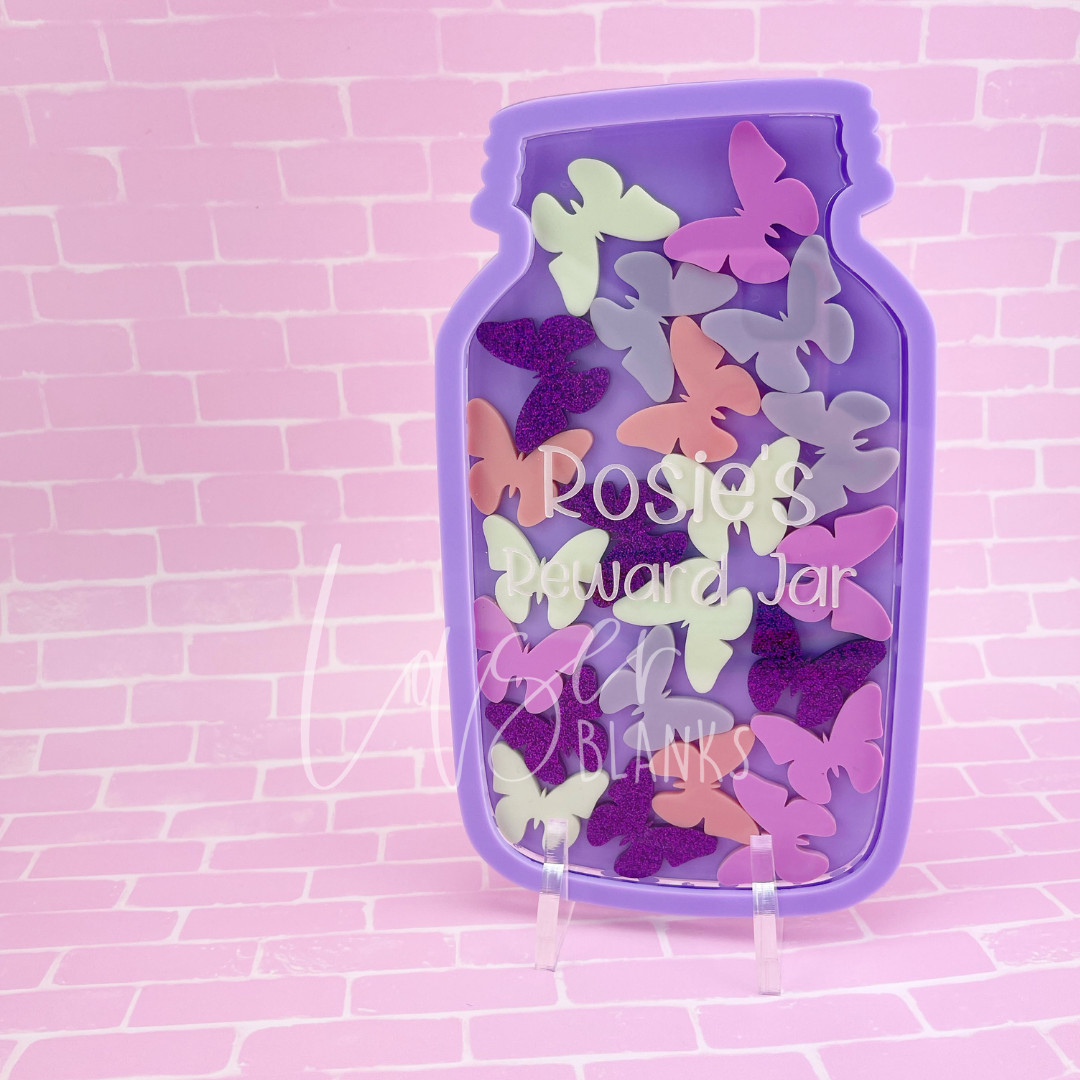
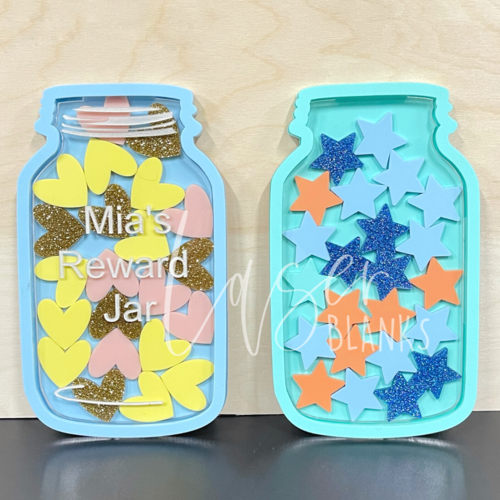
Track Goals with Our Customisable Acrylic Reward Jar
Our acrylic reward jars are a fun, effective and reusable way to track progress, encourage good behaviour, and celebrate achievements. Designed for personalisation and made from premium laser-cut acrylic, these custom jars are perfect for kids, classrooms, workplaces, and homes.
Whether you’re working on daily routines, milestone rewards, or visual motivators, Laser Blanks reward jars are easy to assemble, completely customisable, and built to last.
What Is a Reward Jar?
A reward jar is a positive reinforcement tool that visually tracks progress using small tokens. As goals are achieved, tokens are added to the jar until it’s full—making success tangible and motivating.
Our acrylic reward jars come in three sizes and are perfect for:
-
Teachers rewarding classroom behaviour
-
Parents managing routines and screen time
-
Adults tracking fitness, health, or business goals
-
Therapists and support workers using visual learning tools
Reward Jar Sizes and Token Recommendations
We offer three sizes of reward jars:
-
Mini Reward Jar – holds approx. 22 tokens (1 packet required)
-
Standard Reward Jar – holds approx. 44 tokens (2 packets required)
-
Teacher Reward Jar – holds approx. 110 tokens (5 packets required)
Each jar is compatible with our full range of laser-cut acrylic tokens, including:
-
Hearts
-
Stars
-
Dinosaurs
-
Bows
-
Smiley faces and more
Tip: If you mix token shapes, the quantity that fits may vary slightly.
Why Choose a Laser Blanks Acrylic Reward Jar?
-
Reusable and eco-conscious – no stickers or paper charts needed
-
Premium finish – made from 2mm and 3mm cast acrylic for durability
-
Designed for personalisation – this is a blank kit, ready for your own vinyl designs and creativity
-
Flat-packed and easy to store – ideal for market stalls, classrooms, and travelling educators
-
Perfect for crafters and makers – a favourite for vinyl cutting projects and giftable creations
-
Australian made – all blanks are precision cut and shipped from our Melbourne workshop
This reward jar kit is a DIY project—you’ll need to assemble and customise it yourself. Want one fully made and personalised? We do offer that too— just click here.
Assembly Guide for Your Reward Jar
All reward jar sizes use the same assembly method. Each kit includes four acrylic components:
-
Coloured back plate
-
Clear spacer layer (adds depth and space for tokens)
-
Clear front plate
-
Coloured top plate with token slot
They must be put together in the above order for the reward jar to work correctly.
Before You Start:
-
Remove all protective film from each piece
-
Work on a clean, lint-free surface to avoid scratches
-
Apply personalisation (vinyl lettering) before assembling or after glue has dried for 24-48 hours.
Recommended Glue:
Use E6000 glue for a strong, clear hold.
Apply with a toothpick to avoid seepage. If glue seeps out, do not wipe—let it dry completely.
How to Customise Your Acrylic Reward Jar
Reward jars are blank acrylic canvases, giving you full creative freedom. Popular personalisation options include:
-
Child’s name or classroom label
-
Motivational wording (e.g. “You Did It!” or “Star Jar”)
-
Themed designs (e.g. dinosaurs, fairies, space, etc.)
For a frosted effect, use etch-look vinyl like Styletech or Metamark. Want to make your jar look like it has a screw-top lid? We’ve created a free SVG file just for that—available to download from our website.
Step-by-Step Assembly Guide
IMPORTANT: Lay your clear top plate on a non-scratch, lint-free surface to avoid marks.
The jar is symmetrical—use the ridges at the top as your alignment guide.
🧩 Assembly Order
- Coloured back plate (bottom layer)
- Thick clear spacer plate
- 2mm clear top plate
- Decorative coloured trim - this piece goes on top of the clear top plate
Take your time, apply glue sparingly, and align carefully.
Share Your Reward Jar with Us
Once you’ve assembled and personalised your reward jar, we’d love to see what you’ve created!
Join our Laser Blanks Facebook Community to share your project and get inspired by fellow crafters, teachers, and creative minds.
Or tag us on Instagram @laserblanks so we can feature your work and celebrate your creativity.
Need Help?
Have questions about tokens, sizing, or glue recommendations? Contact us at hello@laserblanks.com.au—we’re always here to help.